Your Cart is Empty
-
By Application
-
By Size
-
By Collection

-
By Application
-
By Size
-
By Design
-
By Color
-
By Application
-
By Size
-
By Design

-
By Application
-
By Design

Few home renovation projects will transform your space as drastically as installing new tiles in your bathroom. Not only will bathroom tiles elevate your home aesthetics, but they’re also easy to maintain and take care of. Bathroom tiles are durable, water-resistant, and relatively low maintenance. If you’re wondering which room to tackle first in your home renovations this year, start small and strong with your bathroom!
We realize that taking on a DIY tile installation project is no small task, so our team put together this in-depth guide. Here’s how to lay bathroom tiles like a pro!
Begin by measuring your bathroom area to determine the square footage of your space. This is a crucial first step as it will tell you how much tile you need to buy for your project. We recommend adding an extra 10% volume to your tile order to accommodate cuts, mistakes, and replacements.
With Mission, you can try before you buy! Order samples of our tiles to see their colors and textures inside your space. If you need some extra assistance kickstarting your project or making design decisions, you can schedule a complementary interior design consultation with one of our experts.
Ensure you have all the necessary tools and materials on hand before diving into the installation.
Here’s a checklist of all of the supplies that you will need to lay your bathroom tiles successfully:
Choosing the right grout for your tile project is one of the most important and often most overlooked steps in the tile installation process. Knowing how to choose the right grout for your tile project is a skill you’ll need to hone. Take the time to select the correct grout for your project to ensure longevity and quality in your installation.
Creating a solid foundation before starting your tile installation is crucial. Clean the floor thoroughly, remove debris, and repair cracks or imperfections. We recommend using a level to ensure your floor is even before laying any adhesive or tile.

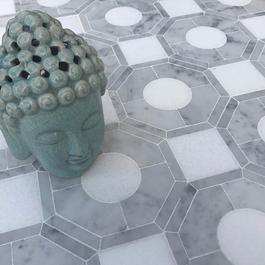
Decide on a tile pattern that complements your bathroom. Depending on what look and feel you’re going for, you can choose between natural stone, porcelain, or ceramic tiles. All of these tiles serve different purposes and will carry their own feel into your space.
Before applying adhesive, lay your tiles on the dry floor to visualize how they fit. Consider this step a test run. From here, you can make any necessary adjustments.
Once you are ready to apply your adhesive, follow the manufacturer's instructions to mix and prepare it. Use a trowel to spread the adhesive evenly, starting from the center of your floor and working outward.
Place the tiles firmly into the adhesive, using spacers to maintain even gaps between each tile. Use a tile cutter to make precise cuts around the corners and edges of your space.
After you’ve placed your tiles firmly into the adhesive, allow them plenty of time to set. We strongly recommend closely following the manufacturer's recommended drying time for your specific adhesive before moving on to the next step.
Prepare the grout mixture as instructed by your selected manufacturer. Spread it over the tiles using a grout float, ensuring it fills the spaces between tiles completely. Hold your grout float at a 45-degree angle and spread your grout in sweeping arcs. Work in small areas at a time rather than trying to apply it all at once with large strokes.
After you’ve spread the grout over your tiles, it’s important to clean and remove the excess. To remove excess grout, use a damp sponge and move it diagonally across the tiles. Rinse the sponge frequently to avoid dragging out more grout than necessary.
After the grout has cured for the specified time, we recommend applying a grout sealer to protect against moisture and any future stains. Grout, on average, takes 24-72 hours to dry. Refer to your chosen grout’s instructions to determine how long to let your grout sit before sealing it.
Once the tiles and grout have completely dried and settled, you can reinstall your bathroom fixtures, like toilets, sinks, and cabinets. This is the exciting part because now you can really start seeing your bathroom come together!

Floor Tile: Imperial Waraga Deco Porcelain 8X8
Maintain your newly tiled bathroom by cleaning regularly with a mild detergent and water. When cleaning your bathroom tile, avoid harsh chemicals that could damage the grout.
Depending on whether you're dealing with porcelain, glass, ceramic, or natural stone tiles, there are specific best practices to follow to ensure optimal cleanliness.
For example, natural stone tiles can scratch much more easily than porcelain and ceramic tiles. Natural stone tiles like granite and marble are also sensitive to cleaners' pH and acidity levels. One size does not always fit all when it comes to cleaning tiles. After spending so much time on your tile installation, it’s crucial to carry that same attentiveness into your cleaning processes. You want to preserve the quality of your hard work as long as possible, right?
In short, we recommend cleaning your tile based on its material to preserve its quality and finish.
If you notice any cracks or crumbling grout in your bathroom over time, promptly repair it to prevent moisture from seeping under the tiles. If moisture does start seeping under the tiles, a larger repair or replacement will likely be needed.
To make the most out of your tile, it’s important to reseal the grout periodically. By industry standards, resealing your grout every one to two years will help significantly in maintaining its integrity and water resistance.

Wall Tile: Imperial Midnight Ceramic Tile 4x4
Laying bathroom tiles is a rewarding DIY project that will enhance both the appearance and functionality of your space. With careful planning, precise execution, and proper maintenance, you can achieve a stunning and durable tiled bathroom that will add value to your home for years to come!
Remember, patience and attention to detail are key throughout any tile installation process. Whether you're a seasoned DIY enthusiast or a true beginner, following these steps will help you navigate the tile-laying process effectively and achieve professional-looking results in your bathroom renovation journey.
Gather inspiration by browsing through ourtile collections or schedule a consultation with one of our design experts to get the ball rolling on this exciting home design project!
 Responsive Customer Service
 Expert Design Consultation
 Homeowner, Contractor, Architect & Designer Friendly